Summer Ratatouille

Sage Mountain Farm
Summer’s Bounty, Beautifully Layered!

When I saw the gorgeous purple and white Japanese eggplant this week in my CSA box, I was filled with longing and dread.  Let me explain… My favorite color is purple, so naturally I love the eggplant with it’s deeply purple skin.  A vegetable that’s purple, what could be better? (perhaps a purple cookie…I digress) So of course, this explains the longing.  I want to love the flavor of such a beauty as well.  Which leads to the dread.  I have NEVER been able to prepare eggplant myself that tasted any good.  It had become such a problem that I had been banned from ever buying an eggplant again.  Sometimes you just gotta cut and run.  Let things lie…you know, quit while you’re ahead and such.

Since this eggplant came to me via my weekly farm box, I didn’t feel like I was violating the eggplant ban because I didn’t choose it, it chose me, so to speak.  I knew that I had to try again to catch my unicorn…decent homemade eggplant.  This time I nailed it!  But what was different this time you might ask?  Two things were different, and both contributed to my new-found success.  First I had never tried Japanese eggplant before, always the big fatties.  This was a good change because one of the problems that I usually encounter with home cooked eggplant is the chewiness and I think eggplant texture is a good example of a little being good and too much being not so good.  Second, I finally took the time to prepare the eggplant ahead of time.  It is usually listed as optional in eggplant recipes, but I have found it to be completely mandatory!  You must salt, drain, squeeze, rinse and pat dry.  You must.  I promise that it makes a huge difference.

All of the summery goodness that I needed for ratatouille was at hand, thanks to Sage Mountain Farm.  I had eggplant, leeks, tomatoes, garlic, fresh basil, and zucchini.  This dinner went over well with the fam and I have to say that the smell coming from my oven when this was baking was A. MAZE. ING!  Try it and you’ll see for yourself!

Summer Ratatouille

4-5 Japanese eggplant, sliced and prepared ahead of time (NOT OPTIONAL)

3 zucchini, sliced

5-6 small tomatoes, sliced

8-10 cloves of garlic, minced

2 leeks, sliced

1/2 c vegetable broth, divided (or olive oil, or a combination of both)

fresh basil, chopped

salt and pepper to taste

Method:

First thing to do is to prepare your eggplant.

Sage Mountain Farm
Eggplant slices

Get out a colander and place a layer of eggplant slices in the bottom.  Salt this layer liberally.  Another layer of sliced eggplant, more salt.  Lots of salt.  The purpose of this is to draw out the excess moisture, which can give eggplant a slimy mouth-feel, and any bitterness that may be present.  You will end up rinsing this salt off so don’t worry about how much to use.  Continue to layer eggplant slices and salt until you have sliced and salted it all.  Let this drain in your sink, and walk past occasionally to press the whole thing lightly.  I put a bowl on top of the eggplant that fit inside my colander to do my pressing for me.

While this is going on slice up everything else.  Get out a glass casserole dish and put a little olive oil or broth in the bottom and then preheat the oven to 350 degrees.

Once everything is prepared and your eggplant has been draining for between 30 minutes and two hours you are ready!

Start your ratatouille with a layer of leeks.  Next, for the eggplant layer, you need to grab a handful of eggplant slices and squeeze hard under running water.  Pat these slices dryish and build your eggplant layer.  This will take several handfuls in my experience.  After the eggplant layer, put on zucchini slices followed by tomato slices.  Then salt, pepper, garlic and basil all over the tomatoes.  Continue making these layers until all of your ingredients are used up.  When that happens take the rest of your broth (or olive oil) and drizzle it all over the top.  Bake for about one hour and enjoy the smells coming from your oven!
Sage Mountain Farm
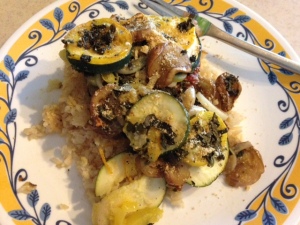
Another veggie packed meal!

We served this over brown rice with almond Parmesan on the top!  Try it out and let me know how you liked it!

Thank You!

Hello everyone!  Thank you to those of you who submitted recipes, photos and ideas for using the delicious food that we grow here at Sage Mountain Farm.  I will be posting some of them here so you can see what others are doing.  Keep comin’ back and you will be inspired by your fellow CSA supporters!

On another note, I wanted to share something with you.  Well, I guess every time I post I am sharing something, but this is more personal.  I finally followed the advise of so many wise kitchen gurus…I prepped all of my veggies this weekend.

What a Time Saver!
What a Time Saver!

What do I mean, specifically?  I washed and chopped lettuce.  I trimmed and sliced onions and garlic.  I washed, trimmed, and ate all of the strawberries right away, of course.  In other words, I made it super easy to use all of my organic veggies and fruits!  Since I prepped, I have used green onions on a few things, onion and garlic in a few recipes, and I have eaten countless small salads.  When this stuff is ready to use in the fridge, it’s easy to use more of it.  When I am hungry I can just reach in and grab a few containers and have a meal started in no time.  I wasn’t taking the time everyday to chop a little lettuce, or slice up one onion, etc.  So when the end of the week came I had items that weren’t used and some which were wilted and destined for the chickens or the compost.  Sad, I know.  Especially considering that this is the freshest and best produce around!

No more…I have done this weekend prep for two weeks now and I am not only being less wasteful in the kitchen, I am also eating more of what comes in my weekly CSA box.

Speaking of being less wasteful, you guys know about saving your vegetable scraps for broth, right?!  I hope so, it’s an awesome way to extend the usefulness of your veggies.  I usually use a plastic freezer bag, placed in the freezer at all times, and fill it with the trimmings from onions, garlic, peppers, celery, broccoli, etc.  Basically any vegetable that you would consider a soup vegetable you can place the trimmings into the bag.  When that bag fills up, dump it into a stock pot and fill with water.  Boil for an hour.  You could also do this in a slow cooker if watching water boil isn’t your thang’.  When you strain out the veggie solids you are left with an unseasoned broth.  Salt and season to your taste, then either use right away or freeze.  I like to freeze my broth in 1-2 cup portions, just right for recipes!  Easy peasy!

Sage Mountain Farm
Homemade broth from the best organic veggies!

Citrus Ginger Sauce

Here it comes, are you ready?  This recipe today is an original recipe that I have come to rely on at least twice a week.  This is the first recipe in a series that will make it easy for you to eat your greens.  Greens alone are a humble powerhouse of nutrition, but not the poster veg for glamour like say, asparagus or artichokes.  This sauce is the little black dress that will boost your greens to the next level!

Citrus Ginger Sauce

Ingredients:

1 whole (large) orange, peeled

3T soy sauce

2 cloves of garlic

½ inch of fresh ginger

1 T honey

Instructions:

Place all of the ingredients in your blender.  Blend until the orange, ginger and garlic are fully broken down and incorporated.  Easy peasy!  Now since oranges are not all the same size and not everyone’s tastes are the same, I would encourage you to taste your sauce.  You can adjust it as necessary by adding more soy sauce or more honey.  This template works for me (as written) almost every time.

Now, how can this sauce be used for greens?  Here’s how I do it.  First I chop my organic greens into bite size pieces.

Sage Mountain Farm
Slice greens horizontally

This step is important, especially if you are feeding these greens to a kid or someone who is reluctant to eat greens.  I find that it usually isn’t the flavor of greens that puts people off, it’s the texture of cooked greens that does.  Chopping them into bite size, or smaller, pieces gives the greens a more acceptable texture for most people.

Sage Mountain Farm
Chop your strips into bite sized pieces

Next, I rinse them under cold water.  No need to dry them or drain them completely, just shake ‘em off and toss into your pan.  Into the pan you should now add your sauce and an equal amount of water.  How much sauce and water depends on how much greens you are preparing.  On a typical weeknight I will use one bag of greens to half of the prepared sauce and about a cup of water (this is really just a guide, but it’s what I do).  Give your greens a little stir so that the sauce and water are nicely spread throughout the chopped greens.  Put the lid on your pan and wait until things are steaming and boiling, then turn the heat down low and let the magic happen!  For thicker greens, such as kale, collards, and broccoli greens, expect to cook for about 10 minutes.  For more delicate greens, such as spinach, mesclun or spicy salad mix, you should test them around four to five minutes.  Again, this is all up to your taste.  You can use whatever greens you have on hand with this sauce.  I have even used it for broccoli florets.  The sky’s the limit!  It’s a tasty way to enjoy just about any veggie.  To serve you can use these as a side dish as is, or over some rice (we like ‘em with pineapple chunks) as a main dish!

If I have one piece of advice it’s “taste it as you make it”.  The first time you taste your food should not be as everyone else is sitting down to the table and starting dinner.  Don’t fret, food is fun!  You can’t go wrong if you start with a good template and taste as you go.

Prep for Organic Broccoli

Broccoli is one of my all-time favorite veggies.  I have always liked it, even as a kid.  My Granny and I were the ones at get-togethers standing by the veggie tray eating the broccoli.  It’s something we’ve shared, and I like that.

Sage Mountain Farm
Aphids Love Organic Broccoli!

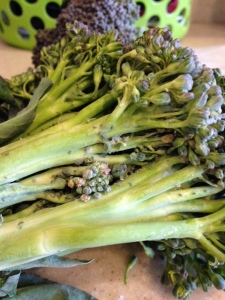
Here’s the tricky bit, virtually ALL organic broccoli has aphids.  Why, well because aphids (the little greenish-grey guys hiding in your florets) love broccoli and are nearly impossible to get rid of organically.  Organic eating means dealing with a few bugs rather than ingesting toxic poison. It’s a trade-off, but one that has amazing benefits for your health, and the health of the Earth.

No need to feed your chickens any more of that fabulous broccoli.  No need to [gasp] send nasty emails to the hardworking folks at the farm, not that you would do that, ahem [cough, cough].

Here is the method that I used today to get those pesky aphids out of my organic broccoli.  First I separated the bunches of broccoli from each other.  Then I filled up my sink with cold water about half way.  Next I added salt to the water.  Think ocean water as you taste it.  Seriously, add about a 1/4 to 1/2 cup of salt to your sink.  Then comes the part that you may or may not enjoy.  I found it astonishing, but rewarding because I now knew that my broccoli would be clean and shiny when I was done.  Using a quick plunging motion, crown down in the water, get rid of the aphids.  Shake and plunge and shake and plunge.  You will see the little buggers just floatin’ away.

Sage Mountain Farm
Clean and Shiny!

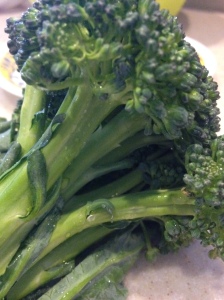
Repeat with all of your broccoli and then set them aside, while you drain and rinse out your sink.  Then, using a sprayer if you’ve got one, rinse thoroughly with cold running water.  Voila!  Clean and shiny!  Way to go!

Oh! One more thing…Do this as needed.  By that I mean, if you want broccoli for dinner, do this as part of your meal prep.  Do not do this ahead of time, you will end up with rubbery broccoli.  After this careful, loving preparation it would be devastating to rubberize your prized broccoli, no?

Now that my organic broccoli is prepped and ready to enjoy, I can call my Granny!